
- What is Git?
- How to use Git?
- Git + GitHub Desktop Basics for Beginners.
Time to Backup!
It's time to learn how to use Git to backup your code the right way. It's essential to know for any developer so you can:
🔹 Secure your code
🔹 Track changes
🔹 Provide version control
🔹 Collaborate with others
🔹 Work on new features in parallel
🔹…and much more.
And it's really easy to start, so do not skip on Git!

🤔What is Git?
Git is a version control system that tracks changes in your code so you can save versions, undo mistakes and collaborate with others.
🧠Think of it as a smart backup tool with a Time Machine for your code.
To work with Git you need to create a GitHub account to create a Git-Repository. It's like a project folder on a cloud☁️.
Here's a general overview of how it works:
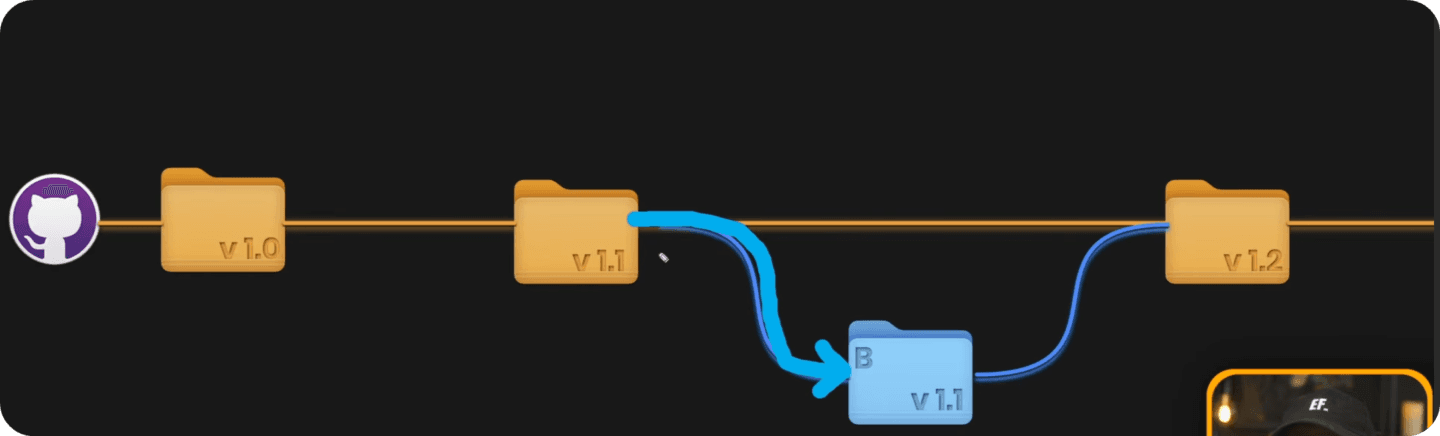
So you create a GitHub Repository and upload your project with version 1.0. Then you keep working on it and eventually you update your changes as a new 'milestone' with version 1.1. And so on...
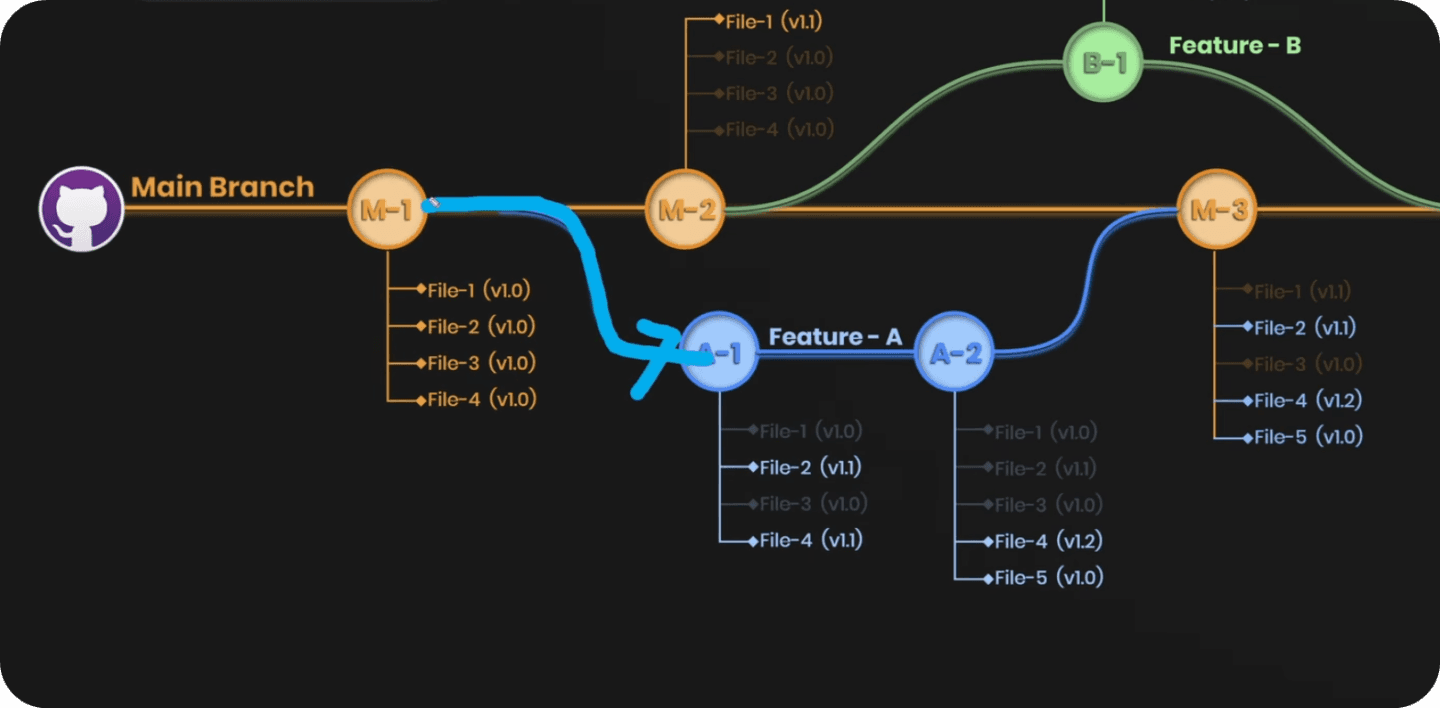
On top of that, you have an option to work in parallel. It's like duplicating your project into 2 folders and working on different features, and later merge them together to join changes.
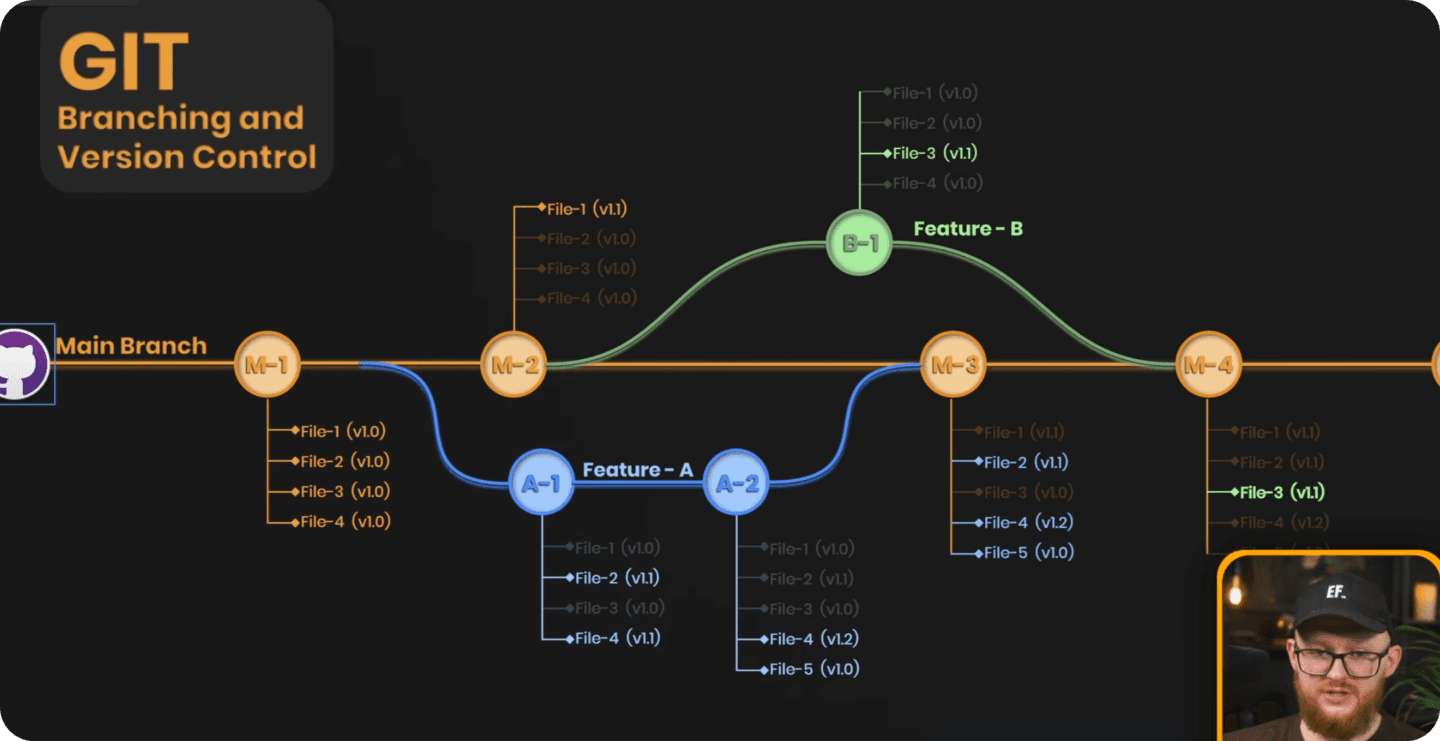
This allows you to keep main-branch as production and create multiple branches for feature development or collaboration with others. And you'll only merge when feature is fully tested and functional so it doesn't break your production state. Very smart!
And the best part?
You can always reference older versions.
You can undo mistakes.
And everything is optimized for code
Here's another illustration of the git flow with multiple branches. I hope it gives you a better understand of how it can be used.
How To Use Git?
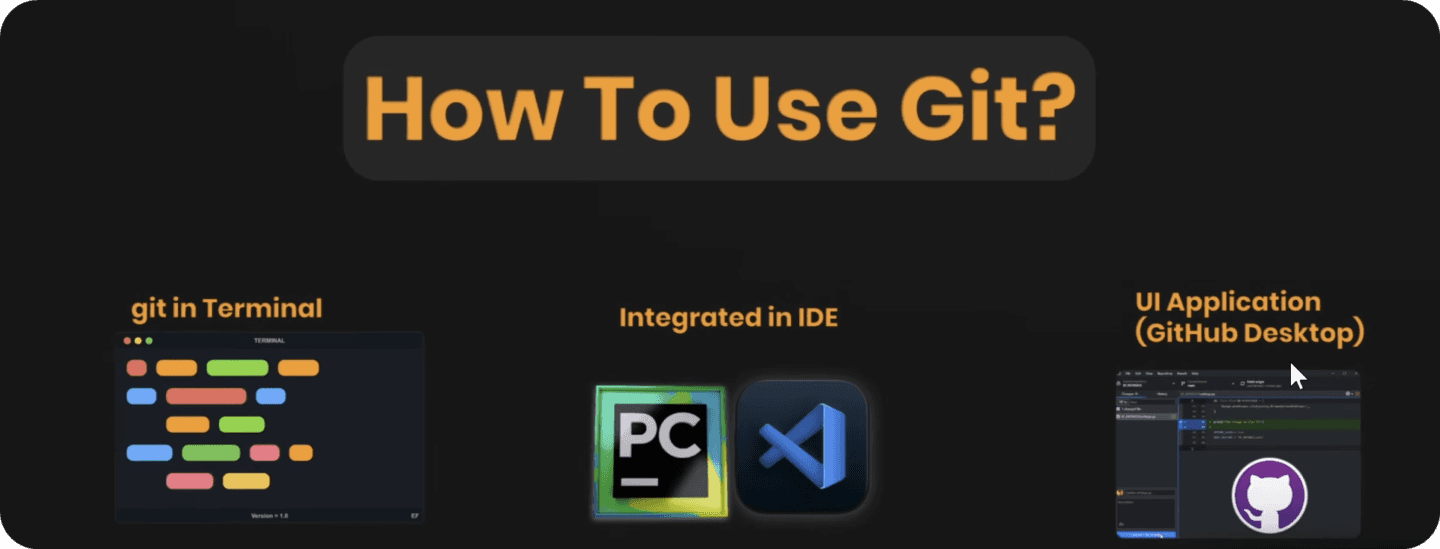
There are three main ways to use Git:
Terminal - the classic but scary for beginners. Everything is text-based and command-driven. Most tutorials use this, but I don't recommend it when you’re just starting out.
IDE Integration - All popular IDE like pyCharm have an integration to make it easier to
push/pullyour changes from Git. It's not as scary as the terminal but it's still can be confusing and clunky. Not my cup of tea...GitHub Desktop (UI App) - Using the dedicated desktop app with the most beginner-friendly user interface. You literally need five minutes to get comfortable with basic functionality and that's exactly what I'm going to teach you today.
🐈Getting Started with GitHub Desktop
To begin working with Git we need to do a few things:
Create a FREE GitHub account (Click Here).
Download GitHub Desktop App (Click Here).
Install GitHub Desktop and Log in.
Create a new repository .
Publish Repository (Save on Cloud)
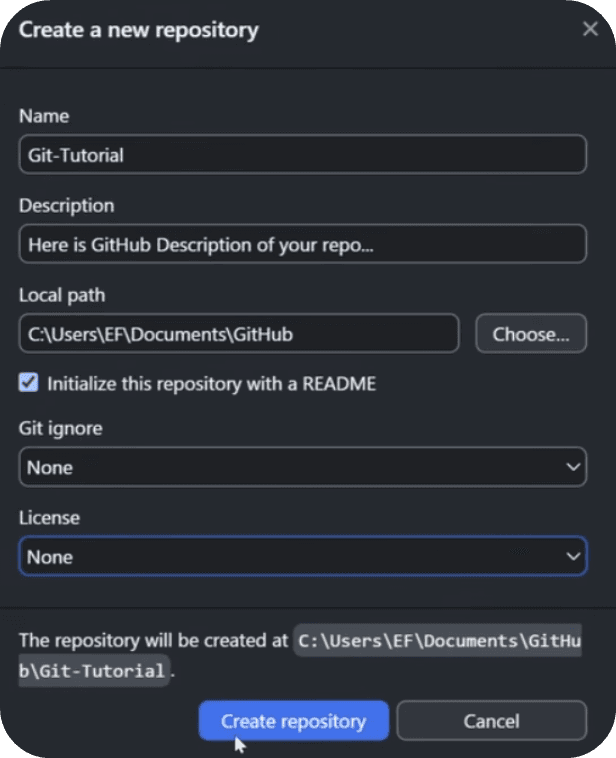
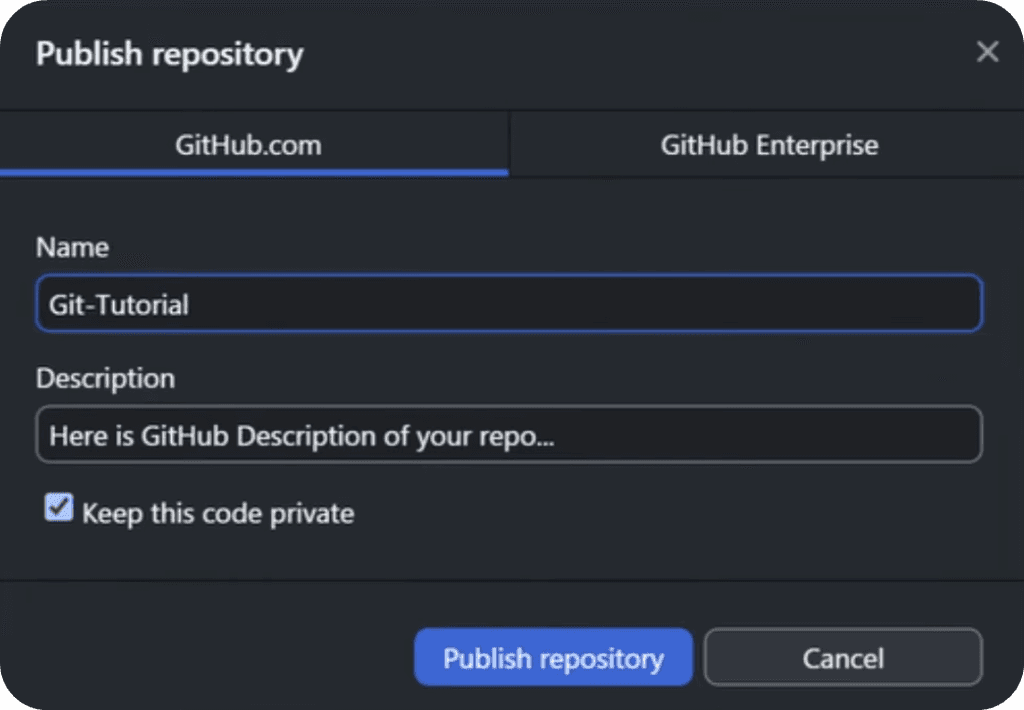
And now you'll see your project/repository in the GitHub Cloud and on your local machine. Think of it as a folder with a sync feature on the cloud but specifically made for code.
Awesome Readme
Inside your project you can place a markdown file - README.md.
It will be used as a home-page design of your Git Repository where you can describe your project and mention key features (Useful for Public projects). And don't worry if you don't know anything about markdown.
It's a very simple and straight-forward to use and you can find a lot of code examples to copy and learn from.
Once you find a good README.md file, just click on the Code button to see raw-markdown syntax. You can copy and learn from it.
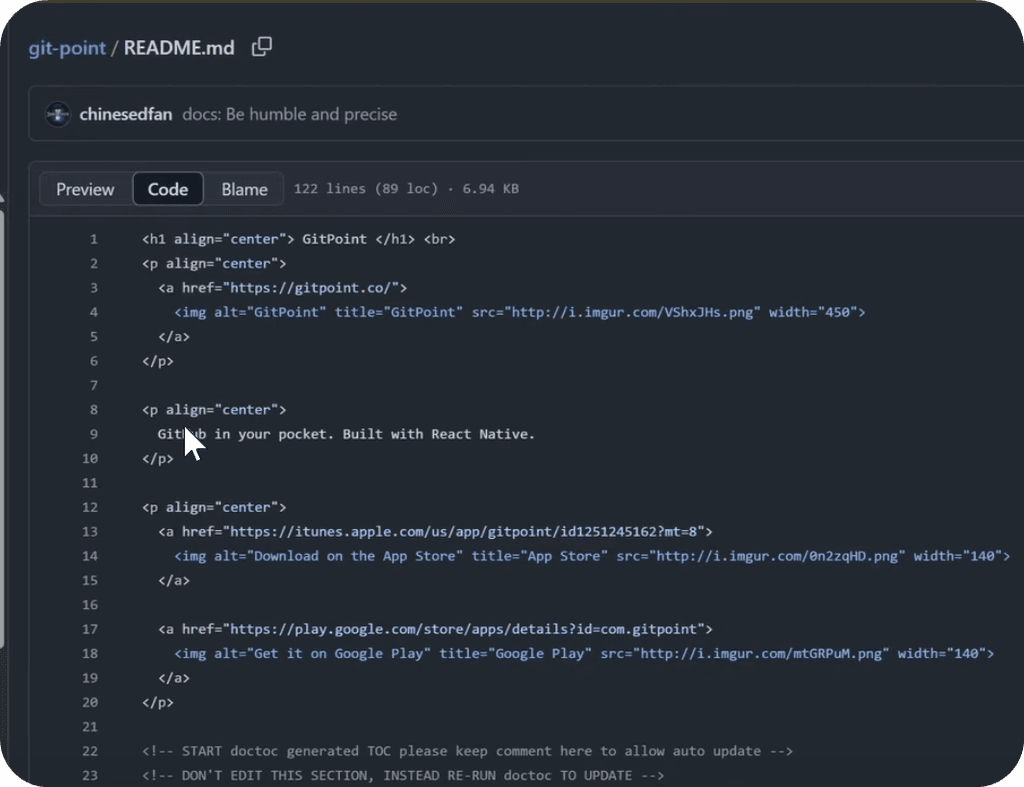
💡P.S. You can also ask ChatGPT for help, it's a pro in Markdown syntax.
Lastly, once you create your README file, don't forget to send it to the GitHub repository on the cloud (Save).
🔒Commit + Push = Save Changes
Now let's look at how to save your code on Git or how to Commit and Push using git terms.
🔹Commit - Save your local changes as a snapshot (NB! It's not send to cloud yet.)
🔹Push - Upload your saved commits to a git cloud (like GitHub).
So to actually save your work on GitHub you need to create Commit (or multiple) and then push them to the server. Just click 2 buttons to save - don't overcomplicate it.
So, whenever you make any changes (add/remove) it will be shown in the list of changes. It's a great overview to understand what has changes and if you actually want to Commit and Push those changes to your repository.
Looks like this:
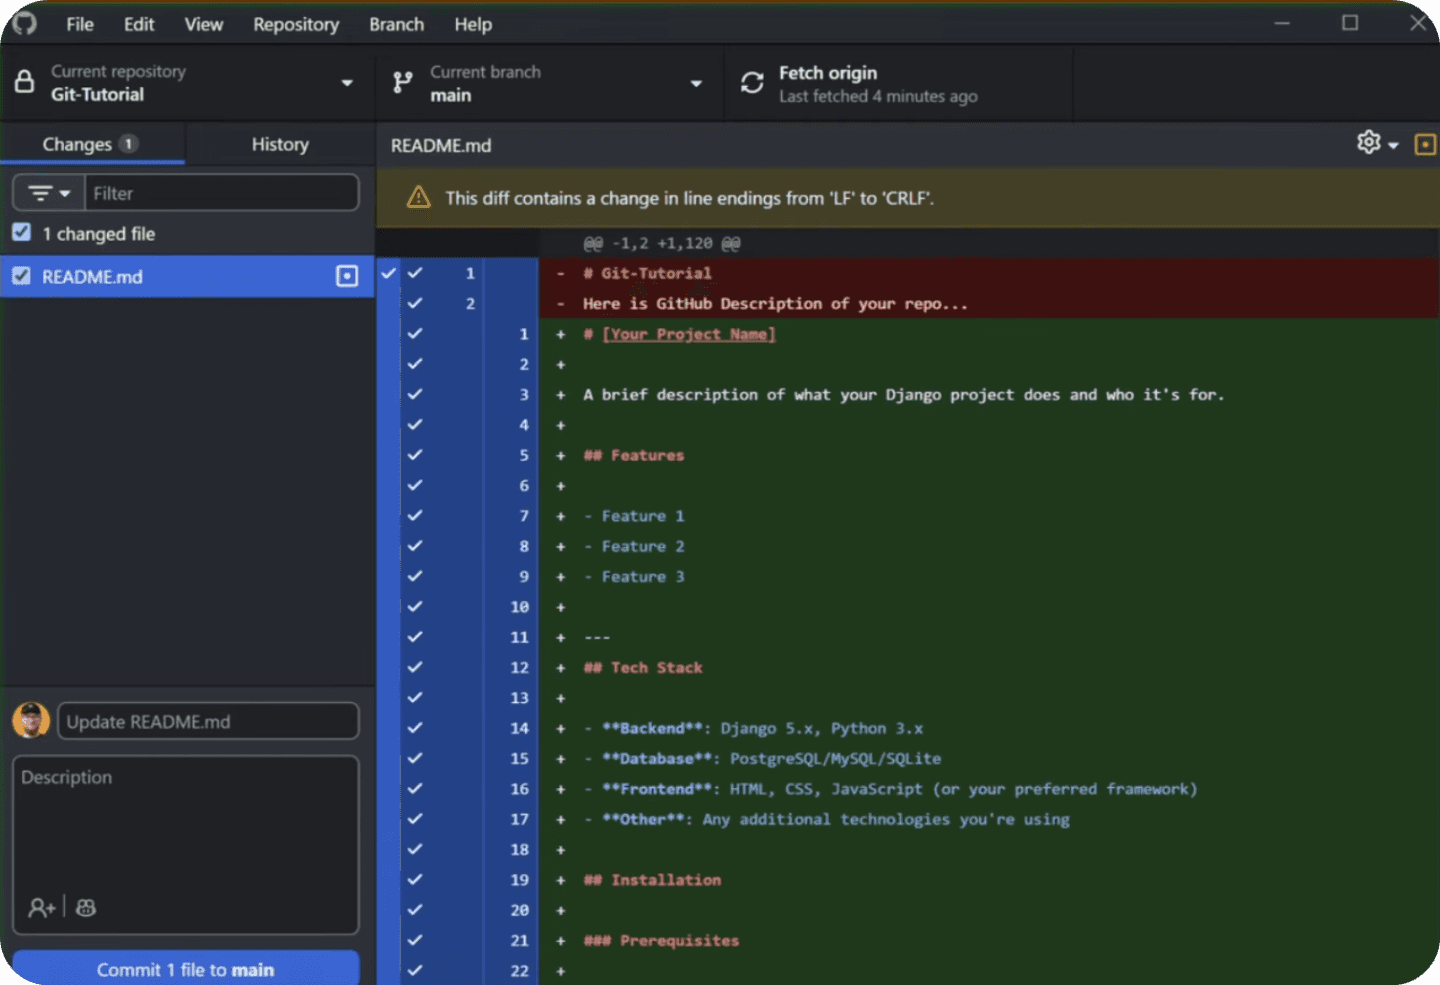
Once you're ready to create a commit, write Commit Message and optional Description that will be shown in Commit History inside your repository.
After you've made one/multiple commits, don't forget to click on Push origin to send your changes to your GitHub Repository.

.gitignore - How To Exclude Files from Git
Once you start working with Git, soon you'll realize that not everything should be uploaded on GitHub. For example you might have:
🔹 Temp FIles
🔹 API Keys (NB!)
🔹 Passwords (NB!)
🔹 Local configs
🔹 Testing Files
🔹 And A lot more...
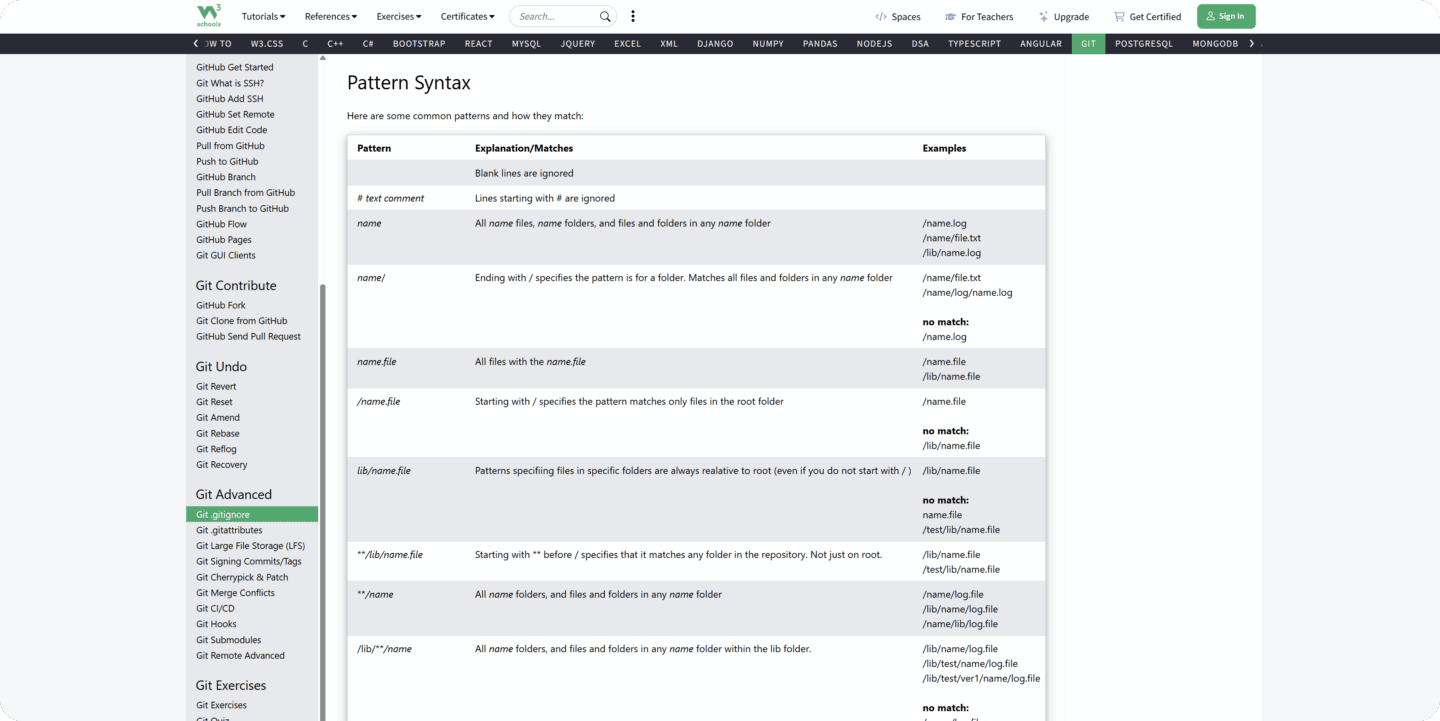
And luckily we can exclude Files/Folders by specifying naming pattern in a .gitignore file. It's like a set of rules for filtering what can be added to git.
It's best to reference Pattern Syntax guides to get the general idea of how it looks. (Check this Pattern Syntax table)
On top of that, since we're using GitHub Desktop🐈:
You can simply Right Click -> Ignore FIle/Folder and it will append correct syntax in .gitignore file so you don't even have to think about it.
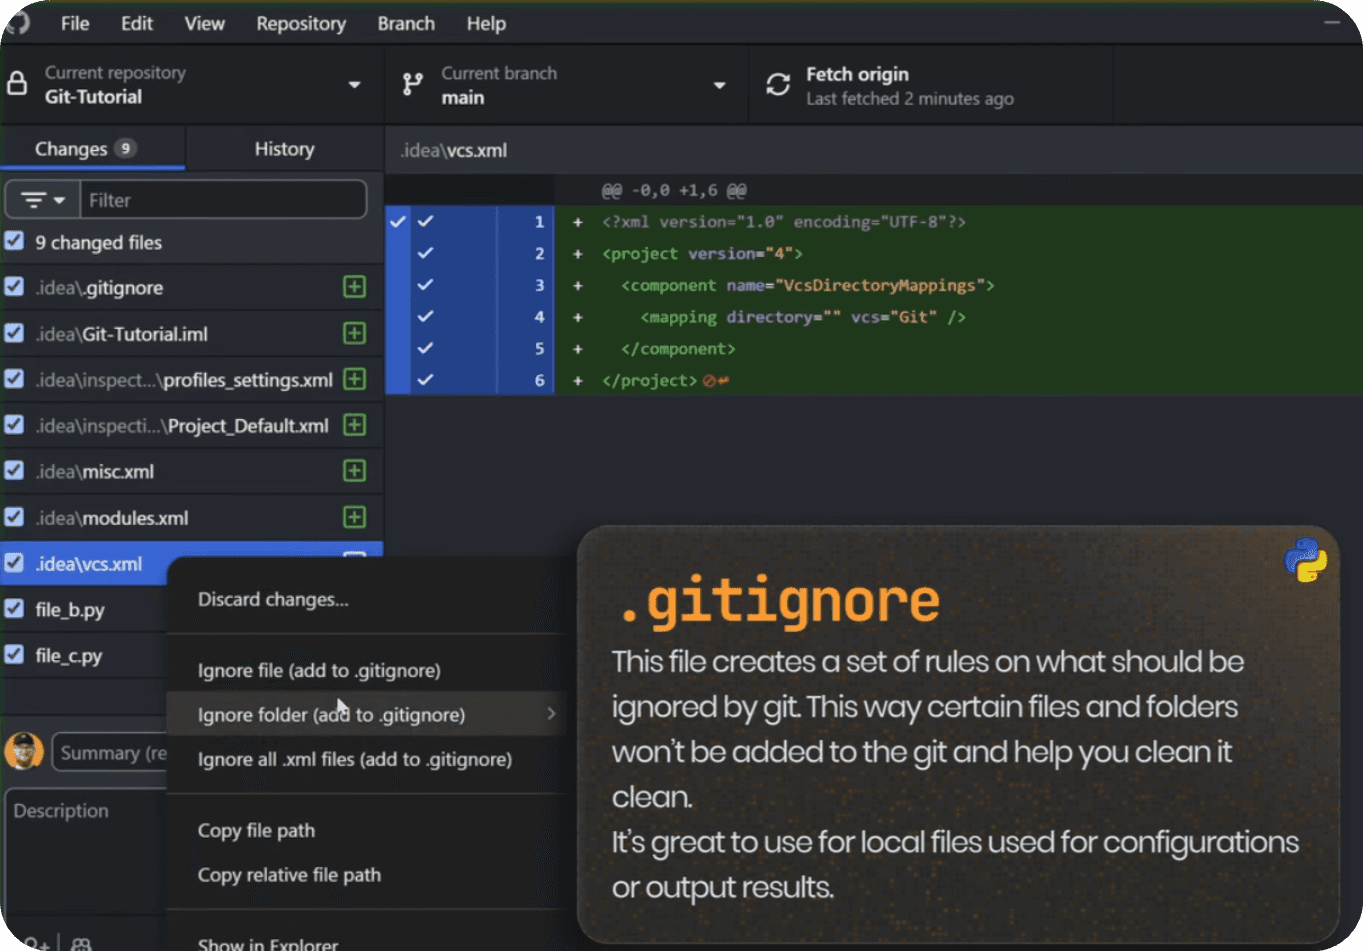
For example, in this lesson I've excluded .idea folder which is a pyCharm Configurations. There's zero point adding it to Git, so it's best to exclude it right away.
💡Don't forget to Commit/Push your .gitignore file on the cloud...
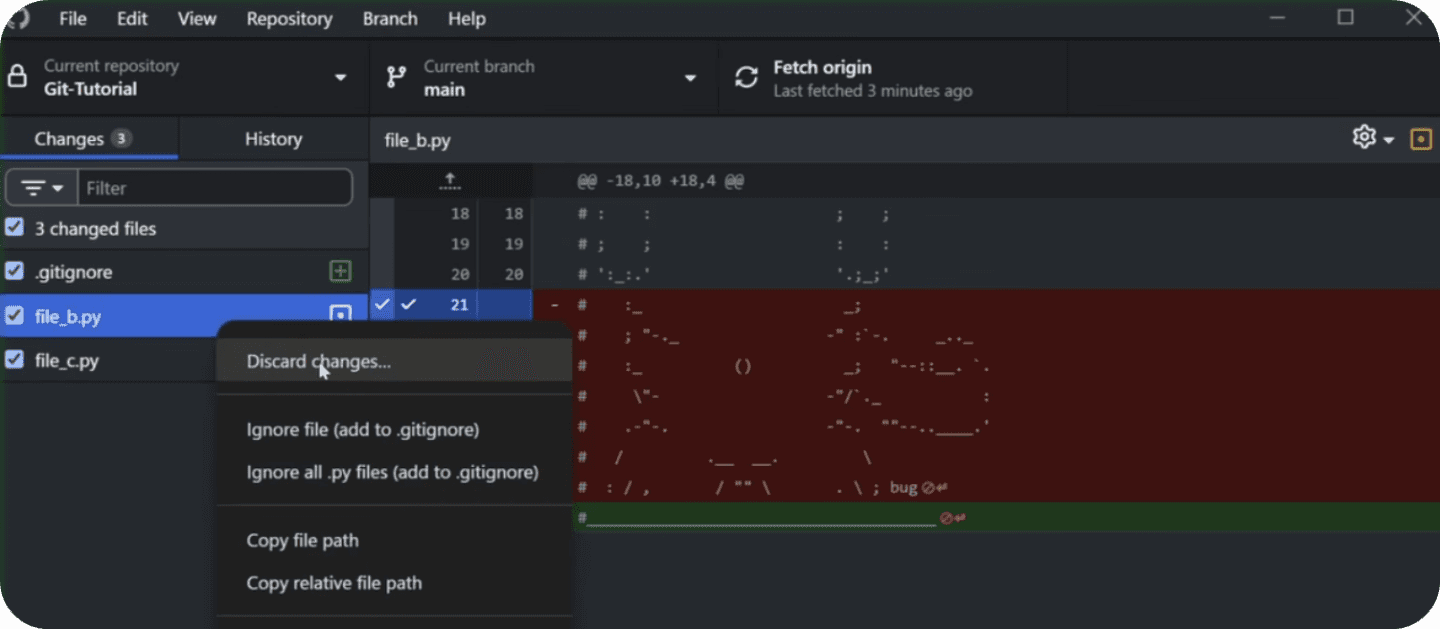
🔥Discard Changes On Git
One of the best things about Git is the ability to discard changes in your Python project.
I use it all the time!

You can experiment with some code and then go back to initial state if nothing worked, or even worse - you broke something...
If that happened, simple discard changes. This makes you more flexible whiel you code without fear of breaking anything (unless you decide to ignore git...)
💡Pro Tip: Create new branches when you have code that you want to save but it's not ready for the main-branch. Great workflow for testing or working on new features.
Create New Branch
Now, let's have a look at how to work with multiple branches. This is a great way to work on new features or collaborate with others and save your changes before you bring them to the main-branch.
Here's a graphic to remind you that we're creating a parallel state of the project and then we can merge it back to the main.
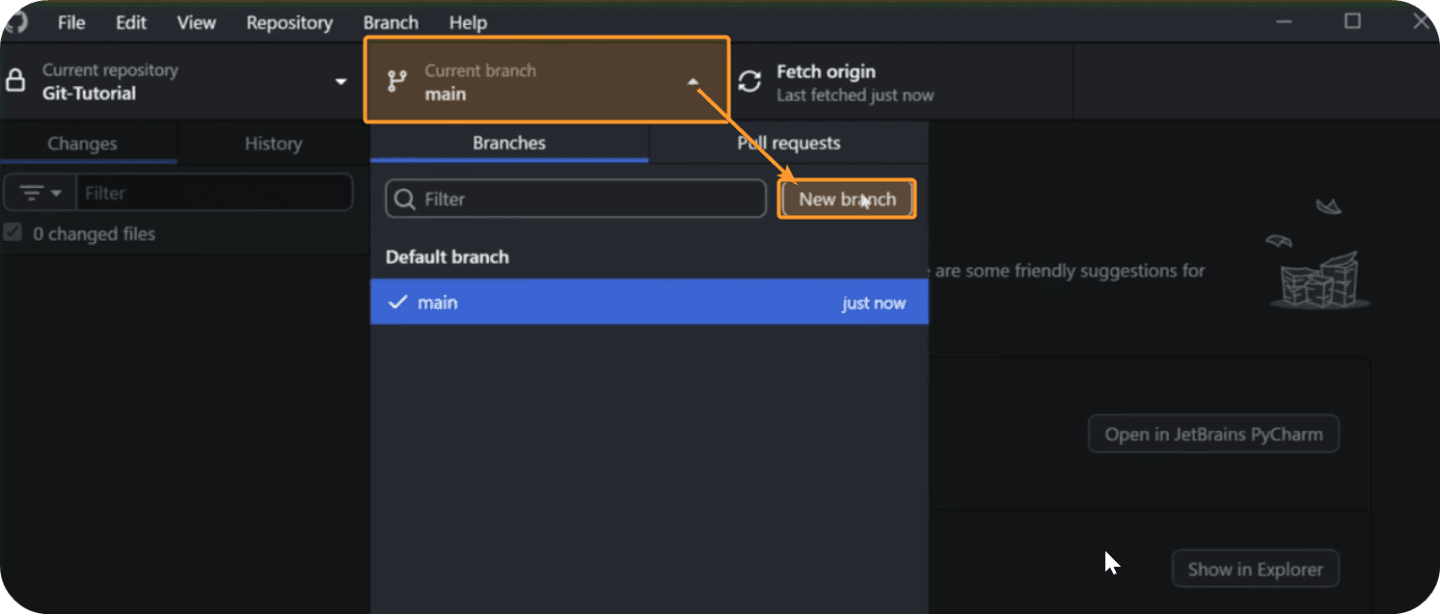
To create new branches in GitHub Desktop open the branch pulldown menu and then click on New Branch. Simple!
Now you have 2 states of the same project and you can work independently. What's important is that whenever you're going to switch branch in GitHub Desktop it will switch the state of the project.
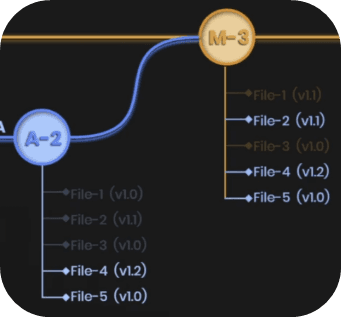
Let's say you have 2 states and they have different new files. If you're going to switch between branches and look at your folder structure, you'll notice that files disapper/change depending on the state. If File-A only exists on the first branch it will disappear when you go to the second branch. And then re-appear when you go back.
So it's like having 2 separate folders in the same location. Reminds me of schroddingers cat - you can't be sure what is the state of your project until you look at it 😸.

Merge Branches
After you create new branches, eventually you'd want to bring them back to the main-branch. And for that you need to create a Pull Request. It's a git terms for creating request for merging 2 branches into 1.
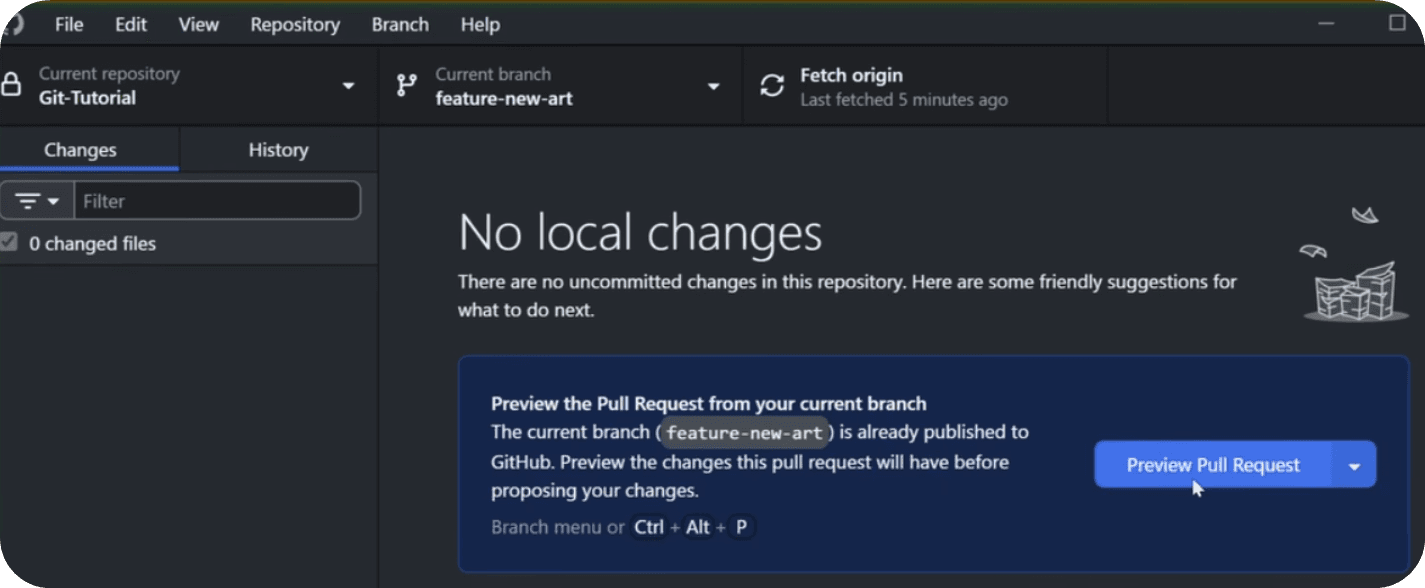
To do that, you'll see that you have a Preview Pull Request button after you created some Commits on a new branch. It's very straight forward process.
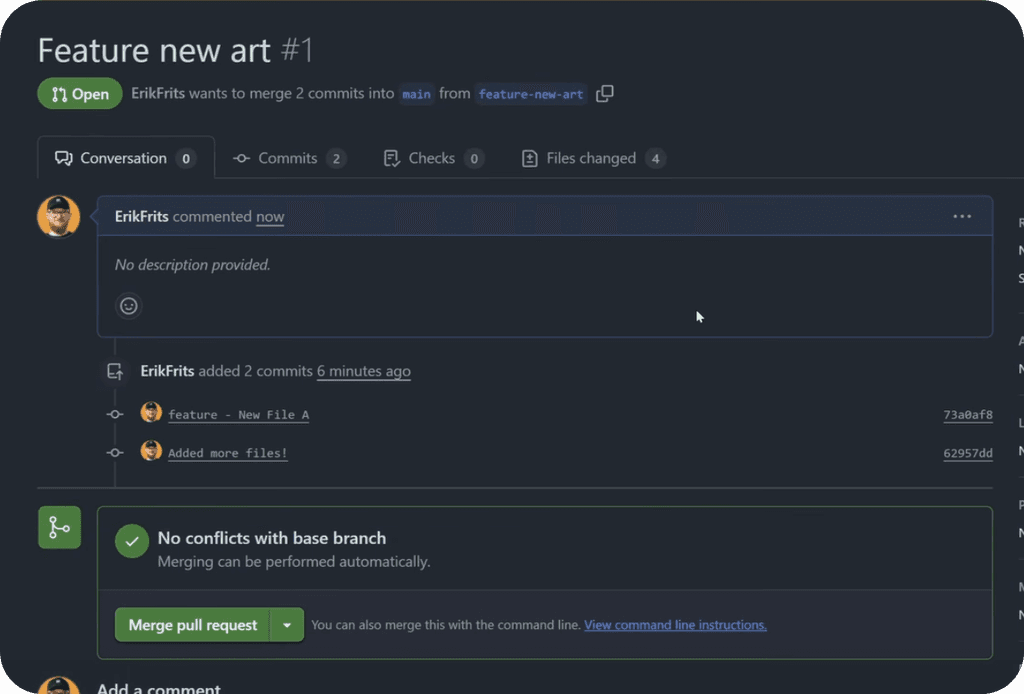
Create Pull Request -> Merge Pull Request
Then it will take you to GitHub where you''ll create a name for your pull request with optional description and then you can confirm it.
When working in teams, it's very common that you'd create pull request and then more senior developer would look over your changes and decide if it's good enough to merge into production or not.
⚠️Sometimes you might have conflicts between 2 branches because you modified the same file differently. Then you need to figure out which one to keep or how to combine them.
And that's the Git Merge

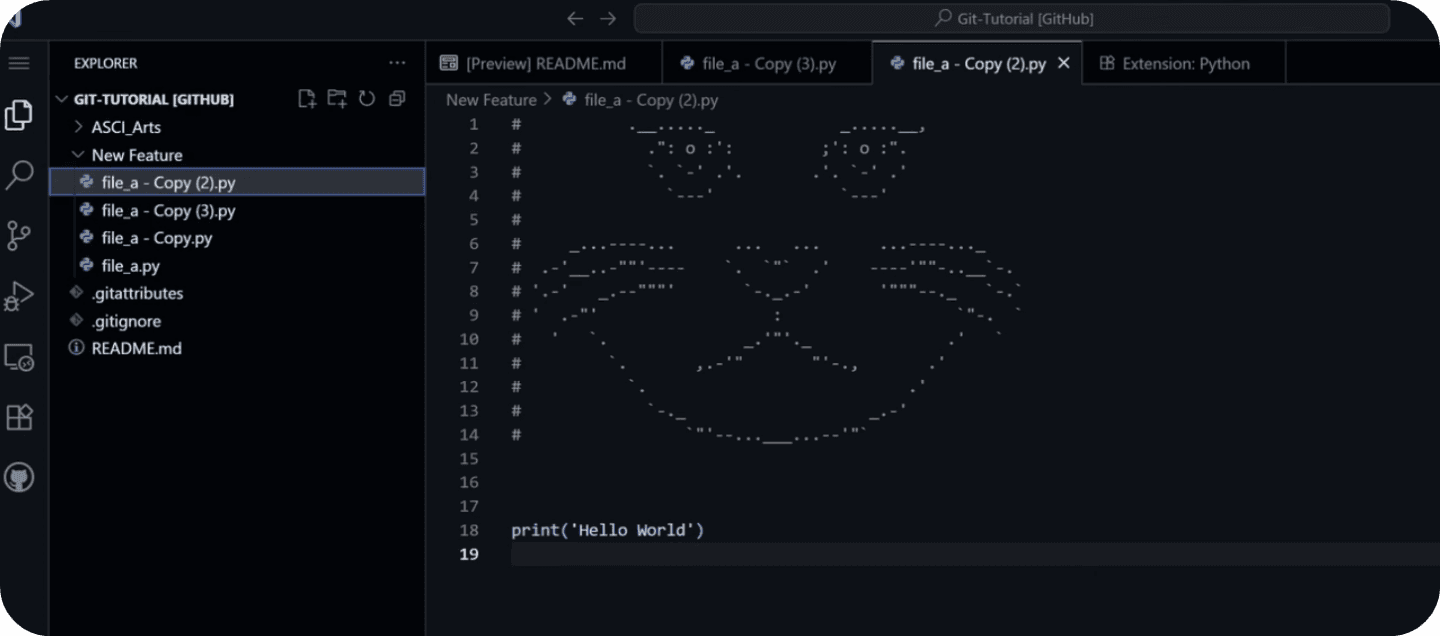
🤫GitHub Secret
Now I want to show you a really cool secret in GitHub that many people don't know about.
You can replace the url from github.com to github.dev and the some magic will happen.

If you do that, then your GitHub repository will be opened in the online version of VS Code. Now it's far superior way to explore files in the repository and you can even make changes.
It's a code editor! So you can write code and create a new commit right in the browser! Mind-blowing, huh?
💡You wouldn't work all the time like this, but it's great for quick revisions or minor changes on the go.
Remarks
And now you know how to work with Git to:
🔹 Backup your code
🔹 Track History
🔹 Work in parallel branches
🔹Collaborate with others
🔹And small things in between
💡 Git has more features, but as a beginner - KISS (keep it stupid simple)
Happy Coding!
🙋♂️ See you in the next lesson.
- EF
Alright, and that's the basics of the Git.
Now I highly encourage you to try it out:- Download GitHub Desktop
- Create GitHub Account
- Create Repository
- Add python files
- Try Commit + Push
- Create new Branch
- Merge 2 branchesGo through all these steps quickly to get better idea and then you can delete and create a brand new repository and start to backup your code the right way.
💡Do not skip this step. It takes 10-20 minutes to set everything up and running and it can save you days of headaches in case your PC dies or you delete some code by accindent. IT"S A MUST FOR ANY DEVELOPER!
⌨️ Happy Coding!
If you have any questions, leave them in the YouTube Comments.
Can I switch to Terminal after GitHub Desktop
Have a Question?